The Evolution of Contemporary Art in the Digital Age

Digital art installation with interactive elements

The art world is undergoing one of its most significant transformations since the invention of photography. Digital technologies are not just providing artists with new tools—they're fundamentally reshaping what art can be, how it's created, who can access it, and what it means to own it. In this exploration, we examine how contemporary art is evolving in our increasingly digital world.

The Rise of Digital-First Art Movements

Traditional art movements emerged over decades, but digital art movements can develop and gain recognition in mere years. Glitch art, which embraces digital errors as aesthetic elements, emerged alongside the internet's expansion. Similarly, generative art—where artists create systems that produce artwork autonomously—has gained mainstream recognition through platforms like Art Blocks.

These movements challenge traditional notions of authorship and artistic skill. When an artist creates an algorithm that generates unique artworks, who is the true creator? The programmer, the algorithm, or the collector who mints a particular iteration? These philosophical questions are becoming increasingly relevant as digital art matures.

NFTs: Revolutionizing Art Ownership and Provenance

The emergence of Non-Fungible Tokens (NFTs) has arguably been the most disruptive development in the contemporary art market. By creating verifiable digital scarcity and establishing clear ownership records on blockchain networks, NFTs have solved longstanding problems in digital art collection.

While the 2021 NFT boom captured headlines with multi-million dollar sales, the technology's lasting impact may be in creating new economic models for artists. Smart contracts enable artists to receive royalties from secondary market sales—a revolutionary concept in the art world where artists traditionally benefited only from initial sales.

AI as Collaborator and Creator

Artificial intelligence has evolved from a tool to a creative partner. Artists like Refik Anadol use machine learning algorithms to transform massive datasets into stunning visualizations, while others employ GANs (Generative Adversarial Networks) to create entirely new aesthetic forms that blur the line between human and machine creativity.

The ethical questions surrounding AI art are complex. When an AI creates an image based on millions of existing artworks, where does inspiration end and appropriation begin? These debates are shaping both legal frameworks and artistic practices as AI becomes more sophisticated.

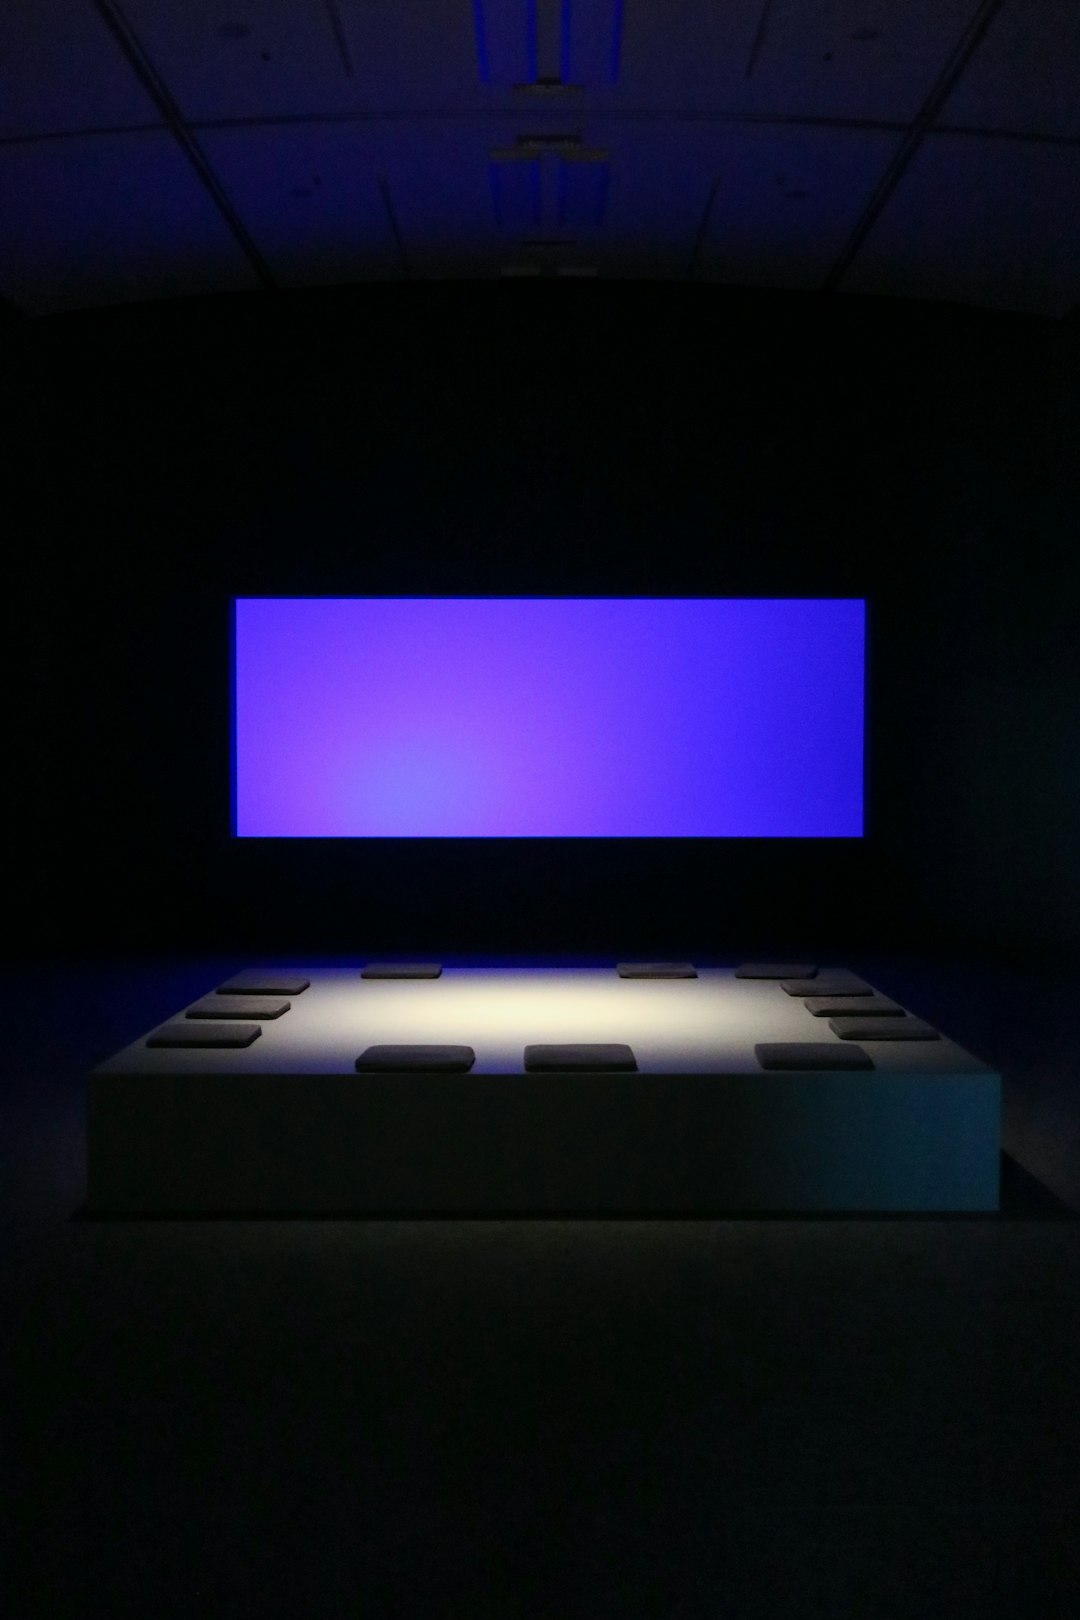
Virtual and Augmented Reality Experiences

Digital technologies are transforming not just how art is made, but how it's experienced. Virtual reality galleries allow global audiences to explore exhibitions without physical limitations, while augmented reality brings artworks into our everyday environments through smartphone cameras.

Artists like teamLab have created immersive digital installations that respond to viewer presence and interaction, challenging the traditional passive relationship between artwork and audience. These experiential works prioritize the moment of engagement over the creation of permanent objects.

Digital Preservation and the Challenge of Obsolescence

As art becomes increasingly digital, preservation presents unique challenges. How do we ensure that file-based artworks remain accessible as formats and software become obsolete? Museums and collectors now face the task of preserving not just physical objects but also code, software environments, and display technologies.

Some artists intentionally incorporate technological obsolescence into their work, creating pieces that will inevitably degrade or become inaccessible—a commentary on our rapidly changing technological landscape and the impermanence of digital culture.

The Democratization of Art Creation and Distribution

Digital tools have dramatically lowered barriers to artistic creation. Free or affordable software, online tutorials, and social media platforms have enabled emerging artists to develop skills and find audiences without traditional gatekeepers. This democratization has led to an explosion of diverse voices and styles in contemporary art.

However, this accessibility also creates challenges around curation and discovery. With millions of artists sharing work online, how do exceptional talents stand out? New curation models, from algorithmic recommendations to decentralized autonomous organizations (DAOs), are emerging to address this challenge.

Environmental Considerations in Digital Art

The environmental impact of digital art, particularly blockchain-based works, has sparked important conversations within the art community. While early NFT platforms relied on energy-intensive proof-of-work consensus mechanisms, the ecosystem is rapidly evolving toward more sustainable alternatives.

Many digital artists are now incorporating environmental themes into their work or choosing platforms based on their ecological footprint. This consciousness reflects a broader trend of artists engaging with the societal implications of the technologies they employ.

The Future of Digital Art Institutions

Traditional art institutions are adapting to the digital revolution. Major museums are acquiring digital works, establishing NFT collections, and creating hybrid physical-digital exhibition spaces. Meanwhile, entirely virtual institutions like the Digital Art Museum are emerging as significant cultural forces.

These developments raise fascinating questions about the future of cultural preservation, accessibility, and the very definition of an art institution in an increasingly decentralized digital world.

Essential Digital Art Platforms and Tools

  • Creative Software: Adobe Creative Suite, Procreate, Blender, TouchDesigner
  • NFT Marketplaces: Foundation, SuperRare, Art Blocks, Tezos-based platforms
  • Virtual Galleries: Vortic, Kunstmatrix, New Art City
  • AI Tools: Midjourney, DALL-E, Stable Diffusion, Runway ML
  • Blockchain Networks: Ethereum, Tezos, Solana, Polygon

Navigating the Digital Art World

For collectors and enthusiasts entering the digital art space, understanding the technological underpinnings is as important as developing an aesthetic sensibility. Learning about wallets, blockchain networks, and file formats has become part of art appreciation in the digital age.

At Orchard Ribbon Field, we believe the most exciting aspect of this digital transformation is its potential to make art more accessible, interactive, and responsive to our rapidly changing world. The boundaries between artist, artwork, and audience are dissolving, creating new possibilities for creative expression and cultural exchange.

The evolution of contemporary art in the digital age represents not a departure from tradition, but an expansion of art's possibilities. As technologies continue to evolve, they will undoubtedly inspire new forms of creativity that we can scarcely imagine today. The question is no longer whether digital art is "real" art, but how these new forms will enrich our understanding of what art can be.

Back to Blog Next Article: Sustainable Tourism: Travel With Purpose

Creating the Perfect Artist Studio: Essential Elements

Beautiful artist studio with natural light and organized workspace

Every artist dreams of that perfect creative space—a sanctuary where inspiration flows freely and technical challenges fade away. Whether you're working with a spacious loft, a converted garage, or a corner of your living room, the right studio design can dramatically impact your creative output and artistic satisfaction.

After designing studios for hundreds of artists across various disciplines, we've identified the essential elements that transform ordinary spaces into extraordinary creative environments. This comprehensive guide will help you create a studio that not only functions efficiently but also nurtures your artistic spirit.

The Foundation: Choosing Your Space

Before diving into specific elements, it's crucial to select the right foundation. The ideal studio space depends on your medium, working style, and available resources.

Considerations when choosing your space:

  • Ceiling height: Essential for large-scale work and proper ventilation
  • Flooring: Durable, easy-to-clean surfaces that can withstand spills
  • Ventilation: Critical for working with solvents, sprays, or dust-producing materials
  • Accessibility: Easy transport of materials and finished work
  • Utilities: Adequate electrical outlets, water access if needed, and climate control

Remember that perfection isn't always possible—creativity often thrives within constraints. Some of the most inspiring studios we've encountered began as unconventional spaces that artists transformed through ingenuity and vision.

Mastering Natural Light

For most visual artists, natural light is non-negotiable. The quality, direction, and consistency of light can affect color perception, mood, and even your circadian rhythms.

North-facing windows provide the most consistent, diffused light throughout the day, making them ideal for painters and other artists who need stable lighting conditions. South-facing windows offer abundant light but can create harsh shadows and glare during midday. East and west-facing windows provide beautiful morning or afternoon light respectively but require adjustable shading solutions.

If your space lacks ideal natural light, don't despair. Strategic window treatments, light-diffusing films, and carefully positioned mirrors can dramatically improve light quality. Consider installing skylights or solar tubes if structural modifications are possible.

Artificial Lighting Solutions

Since natural light is unreliable (especially during evening work sessions), a comprehensive artificial lighting plan is essential.

Three types of artificial lighting every studio needs:

  1. Ambient lighting: Overall illumination for general tasks and movement
  2. Task lighting: Focused light for detailed work areas
  3. Accent lighting: Highlighting for specific areas or artwork display

For color-accurate work, invest in full-spectrum or daylight-balanced LED bulbs with a high Color Rendering Index (CRI) of 90+. Adjustable track lighting offers flexibility as your workspace needs change, while articulated desk lamps provide precise task lighting.

Intelligent Storage Solutions

Clutter is the enemy of creativity. An organized studio not only improves efficiency but also creates mental space for artistic exploration.

Essential storage categories:

  • Raw materials: Organized by type, size, and frequency of use
  • Works in progress: Designated areas that protect unfinished pieces
  • Tools and equipment: Easy access while keeping sharp or dangerous items secure
  • Finished work: Proper archival storage or display solutions

Consider vertical storage solutions like French cleat systems, pegboards, and tall shelving units to maximize floor space. Transparent containers allow you to see contents at a glance, while labeled opaque bins create visual calm for less frequently used items.

Workflow Optimization

Your studio layout should support your creative process from conception to completion. Think of your space in terms of zones dedicated to different activities.

Common studio zones:

  • Concept/Admin Area: Clean space for sketching, research, and business tasks
  • Creation Zone: Main workspace with appropriate surfaces and tools
  • Drying/Curing Area: Secure space for works in progress
  • Finishing Station: For varnishing, framing, or final touches
  • Cleaning/Utility Area: Sink, cleaning supplies, and proper disposal

The most efficient studios create logical pathways between these zones, minimizing unnecessary movement and cross-contamination between processes (like keeping dusty activities separate from clean finishing work).

Surfaces and Furniture

Your primary work surfaces should suit your medium while offering flexibility for different projects.

Essential studio furniture:

  • Adjustable easels: For painters working at various scales
  • Large, sturdy tables: With surfaces appropriate for your medium
  • Mobile carts: For frequently used tools and materials
  • Comfortable seating: Ergonomic options for long working sessions
  • Proper storage: Both open and closed options for different needs

Consider creating custom work surfaces—a large drafting table with adjustable height, a massive plywood table for mixed media, or specialized surfaces for printmaking or sculpture. Remember that wheels can transform stationary furniture into flexible, multi-purpose elements.

Health and Safety Considerations

A beautiful studio is useless if it compromises your wellbeing. Don't overlook these critical safety elements:

Essential safety features:

  • Proper ventilation: For fumes, dust, and airborne particles
  • Fire safety: Extinguishers rated for your materials, clear exits
  • Ergonomic setup: To prevent repetitive strain injuries
  • Chemical storage: Proper containers and ventilation for hazardous materials
  • First aid kit: Specifically stocked for common studio injuries

Invest in quality respirators, safety goggles, and gloves appropriate for your materials. Create clear protocols for handling emergencies and ensure all studio users understand safety procedures.

Inspiration and Atmosphere

Beyond pure functionality, your studio should inspire and energize you. The atmosphere you create significantly impacts your creative mindset.

Elements that enhance studio atmosphere:

  • Personal touches: Artwork, objects, and colors that inspire you
  • Music and sound: Quality audio system for creating mood
  • Plants: Improve air quality and bring life to the space
  • Comfort elements: Quality seating for contemplation, tea/coffee station
  • Viewing area: Space to step back and assess work from a distance

Consider creating an "inspiration wall" where you can pin reference images, color studies, and works in progress. This visual collection can spark new ideas and provide context for your current projects.

Adapting to Different Mediums

While the principles above apply broadly, specific mediums require specialized considerations:

Painting studios need excellent ventilation, easy-to-clean surfaces, and proper solvent storage. Ceramics studios require access to water, clay storage solutions, and proper kiln ventilation. Printmaking studios need specialized equipment placement and acid-resistant surfaces. Digital artists benefit from cable management systems and proper monitor calibration stations.

Research the specific requirements for your primary medium, but build in flexibility—many contemporary artists work across multiple disciplines and need adaptable spaces.

Budget-Friendly Studio Solutions

Creating your dream studio doesn't require a massive budget. Some of the most effective solutions are surprisingly affordable:

  • Use industrial shelving instead of custom cabinetry
  • Repurpose restaurant equipment (baking racks make excellent drying racks)
  • Create custom work surfaces from door slabs or plywood
  • Shop secondhand for sturdy furniture that can be refinished
  • Use PVC pipes and fittings to create custom storage solutions
  • Implement DIY lighting solutions with basic electrical knowledge

Remember that your studio will evolve with your practice. Start with the essentials and gradually implement improvements as your needs become clearer and resources allow.

Creating Your Sanctuary

Your studio is more than just a workplace—it's a reflection of your creative identity and a sanctuary for your artistic practice. By thoughtfully addressing these essential elements, you can create a space that not only supports your technical needs but also inspires your best work.

At Creative Space Design, we believe the perfect studio balances functionality with inspiration, practicality with beauty. Whether you're establishing your first dedicated workspace or optimizing an existing one, these principles will help you create an environment where your creativity can truly flourish.

Remember that the most successful studios are those that evolve with their artists. Stay open to rearranging, adapting, and reimagining your space as your work develops. Your ideal studio isn't a static destination but a dynamic partner in your creative journey.

Back to Blog

Mastering Oil Painting: Techniques for Beginners

Oil painting materials and workspace setup

Oil painting has captivated artists for centuries with its rich colors, buttery texture, and remarkable versatility. From the luminous portraits of Rembrandt to the vibrant landscapes of Van Gogh, oil paints have been the medium of choice for countless masterpieces. While the prospect of working with oils might seem daunting to beginners, mastering a few fundamental techniques can open up a world of creative possibilities.

In this comprehensive guide, we'll demystify the oil painting process, covering everything from essential materials to advanced techniques that will help you create your first successful oil painting with confidence.

Understanding Oil Paints: The Basics

Oil paints consist of pigment particles suspended in drying oils, typically linseed, walnut, or poppy seed oil. Unlike water-based mediums that dry through evaporation, oils dry through oxidation—a chemical process that can take days, weeks, or even months depending on thickness and environmental conditions.

This slow drying time is both a challenge and an advantage. It allows for extended blending and reworking but requires patience between painting sessions. Understanding this fundamental characteristic will help you develop an effective painting process.

Essential Materials for Beginners

Starting with the right materials will make your introduction to oil painting much more enjoyable and successful. Here's what you'll need:

Paints

Begin with a limited palette of quality student-grade paints. A good starter set includes:

  • Titanium White (large tube)
  • Cadmium Yellow Medium
  • Cadmium Red Light
  • Ultramarine Blue
  • Burnt Umber
  • Ivory Black

Brushes

Invest in a variety of shapes and sizes:

  • Flat brushes (for broad strokes and filling large areas)
  • Round brushes (for details and lines)
  • Filbert brushes (oval-shaped, versatile for blending)
  • Bristle brushes (stiff, for thick paint application)

Surfaces

Choose from several options:

  • Pre-primed canvas (most beginner-friendly)
  • Canvas boards (affordable and portable)
  • Wood panels (stable and archival)

Additional Supplies

  • Palette (wood, glass, or disposable paper)
  • Palette knives (for mixing and painting)
  • Odorless mineral spirits (for cleaning brushes)
  • Linseed oil or other painting mediums
  • Easel (optional but helpful)
  • Rags or paper towels

Setting Up Your Workspace

Proper workspace setup is crucial for both safety and enjoyment when painting with oils:

  • Ventilation: Work in a well-ventilated area, as solvents and some mediums can release fumes
  • Lighting: Natural north light is ideal, but a daylight-balanced lamp works well
  • Organization: Keep your palette, brushes, and mediums within easy reach
  • Protection: Cover surfaces with newspaper or a drop cloth
  • Comfort: Ensure your easel or working surface is at a comfortable height

Fundamental Oil Painting Techniques

Master these core techniques to build a solid foundation in oil painting:

Fat Over Lean

This is the golden rule of oil painting. "Fat" refers to paint with more oil content, while "lean" describes paint with less oil or thinned with solvent. Always apply fatter layers over leaner ones to ensure proper drying and prevent cracking.

In practice, this means:

  • Initial layers should be thin (diluted with mineral spirits)
  • Subsequent layers can contain more oil or painting medium
  • Final layers and impasto passages can be the "fattest"

Alla Prima (Direct Painting)

Also known as "wet-into-wet" painting, alla prima involves completing a painting in one session while the paint is still fresh. This technique is spontaneous and energetic, perfect for capturing light effects and expressive brushwork.

Tips for successful alla prima painting:

  • Work quickly but deliberately
  • Mix enough paint before starting
  • Establish dark and light values early
  • Use thicker paint as you progress

Glazing

Glazing involves applying thin, transparent layers of paint over dry underlying layers. This technique creates luminous, deep colors that are difficult to achieve with direct mixing.

How to glaze effectively:

  • Ensure the underlying layer is completely dry
  • Mix paint with a glazing medium to increase transparency
  • Apply with soft brushes in even, thin layers
  • Build up color intensity gradually with multiple glazes

Scumbling

The opposite of glazing, scumbling involves dragging a thin, opaque layer of lighter paint over a darker dry layer. This creates optical mixing and atmospheric effects, perfect for suggesting fog, haze, or soft transitions.

Impasto

Impasto refers to thick paint application that retains brushstrokes or palette knife marks. This textural technique adds physical dimension to paintings and creates interesting light effects as paint catches illumination from different angles.

Color Mixing Fundamentals

Understanding color relationships will dramatically improve your paintings:

The Color Wheel

Familiarize yourself with primary, secondary, and tertiary colors. Remember that with oils, you're working with a subtractive color system—mixing all primaries theoretically creates black or dark gray.

Value and Temperature

Beyond hue, pay attention to:

  • Value: The lightness or darkness of a color
  • Temperature: Whether a color appears warm or cool

Creating Harmonious Palettes

Limit your palette to maintain color harmony. Common approaches include:

  • Limited palette: Using just 3-5 colors plus white
  • Analogous colors: Colors next to each other on the wheel
  • Complementary colors: Colors opposite each other for vibrant contrasts

Step-by-Step: Your First Oil Painting

Follow this structured approach to complete your first successful oil painting:

Step 1: Preparation and Sketch

Lightly sketch your composition on the canvas using thin paint diluted with mineral spirits or charcoal. Keep this initial drawing simple, focusing on placement and major shapes.

Step 2: Underpainting

Create a monochromatic version of your painting using just one color (typically burnt umber or ultramarine blue) thinned with solvent. This establishes values and composition without the complexity of color.

Step 3: Blocking In

Using lean paint (minimally diluted), block in the major color areas. Focus on accurate color relationships rather than details. At this stage, your painting should look like a colored version of your underpainting.

Step 4: Development

Build up paint thickness gradually as you refine shapes, values, and colors. Work generally across the entire canvas rather than completing one area at a time. This maintains color and value harmony throughout the painting.

Step 5: Details and Finishing

Add final details, highlights, and adjustments. Step back frequently to assess your progress. Know when to stop—overworking can diminish freshness and spontaneity.

Troubleshooting Common Beginner Issues

Muddy Colors

Muddiness occurs when colors become overmixed or contain too many pigments. Solution:

  • Clean your brush thoroughly between color mixtures
  • Mix colors deliberately rather than randomly
  • Allow underlying layers to show through in places

Overblending

While oils are excellent for blending, too much can create weak, lifeless passages. Preserve energetic brushwork by:

  • Using different brush sizes for different areas
  • Letting adjacent colors mix optically rather than physically
  • Knowing when a passage is "finished"

Drying Issues

If your painting isn't drying properly:

  • Ensure you're following the "fat over lean" principle
  • Avoid painting in extremely humid conditions
  • Use a drying medium in lower layers if needed

Developing Your Artistic Voice

As you gain confidence with technical skills, focus on developing your unique artistic style:

  • Study masters: Copy paintings by artists you admire to understand their techniques
  • Paint regularly: Consistency builds skills more effectively than occasional marathon sessions
  • Keep a sketchbook: Record ideas, color observations, and compositional studies
  • Experiment fearlessly: Some of your best discoveries will come from "happy accidents"

Remember that every accomplished oil painter was once a beginner facing the same challenges you are now. With patience, practice, and persistence, you'll develop the skills to express your unique vision through this magnificent medium.

At Artisan Canvas Studio, we believe that oil painting is not just a technique to master but a journey of creative discovery. Embrace the process, learn from both successes and setbacks, and most importantly—enjoy the tactile, sensual experience of moving rich, buttery paint across your canvas.

Back to Blog

The Art of Urban Sketching: Capturing City Life

Urban sketch of a bustling city street with cafes and pedestrians

In our fast-paced digital world, urban sketching offers a refreshingly analog way to connect with our surroundings. This global movement brings together artists, travelers, and everyday people who share a common passion: drawing the world around them, on location. Unlike studio art or photography, urban sketching is about capturing moments as they happen—the fleeting light on a building facade, the dynamic energy of a crowded market, or the quiet intimacy of a neighborhood cafe.

Urban sketching is more than just an artistic practice; it's a form of mindfulness, a way of seeing deeply, and a means of creating personal connections with the places we visit and inhabit. Whether you're an experienced artist or someone who hasn't drawn since childhood, urban sketching offers a rewarding way to document your experiences and see cities with fresh eyes.

What is Urban Sketching?

Urban sketching is the practice of drawing on location in cities, towns, and villages, capturing what you see directly from observation. The term was popularized by journalist and illustrator Gabriel Campanario, who founded the Urban Sketchers organization in 2007. What began as a Flickr group has grown into a worldwide community with local chapters in hundreds of cities.

The Urban Sketchers manifesto outlines the core principles: drawing on location, sharing drawings online, and telling the stories of places. Unlike architectural rendering or technical drawing, urban sketching embraces imperfection, personal perspective, and the energy of the moment. It's about your individual experience of a place, not creating a photorealistic reproduction.

This approach makes urban sketching accessible to people of all skill levels. The focus isn't on technical perfection but on authentic observation and personal expression. A wobbly line that captures the rhythm of a crowd can be more compelling than a perfectly straight perspective drawing.

Essential Tools for Urban Sketching

One of the joys of urban sketching is its simplicity. You don't need expensive equipment or a studio full of supplies. Many experienced urban sketchers work with just a sketchbook and a pen. Here are the essential tools to get started:

Sketchbooks

The choice of sketchbook is deeply personal. Some sketchers prefer small, pocket-sized books that easily fit in a bag, while others work in larger formats. Consider:

  • Size: A5 (5.8 x 8.3 inches) is popular for its portability, while A4 (8.3 x 11.7 inches) offers more space for detailed work
  • Paper weight: 100-200gsm paper handles light washes without excessive buckling
  • Binding: Spiral-bound books lay flat but can be bulky, while stitched books are more elegant but may not open completely flat
  • Paper type: Mixed-media paper works well for various media, while watercolor paper is essential if you plan to use watercolors extensively

Drawing Tools

Your choice of drawing tools will shape your sketching style:

  • Pens: Waterproof fineliners (like Pigma Micron or Uni Pin) are popular for their reliability and waterproof qualities. Fountain pens offer line variation but require more maintenance
  • Pencils: Mechanical pencils don't require sharpening, while traditional pencils offer more expressive line quality
  • Waterbrushes: These revolutionary tools have water reservoirs in the handle, eliminating the need for a separate water container—perfect for sketching on the go
  • Watercolors: Portable watercolor sets (like Winsor & Newton Cotman or Schmincke Horadam) offer professional quality in compact formats

Additional Gear

While not essential, these items can enhance your sketching experience:

  • A lightweight folding stool for comfort during longer sessions
  • A small clipboard if your sketchbook doesn't have a hard cover
  • A waterproof bag to protect your supplies from unexpected rain
  • A smartphone for reference photos (taken after sketching, not before!)

Fundamental Techniques for Urban Sketchers

Urban sketching requires adapting traditional drawing techniques to dynamic, changing environments. Here are essential skills to develop:

Quick Composition

Unlike studio work where you have unlimited time, urban sketching often requires quick decisions about composition. Practice identifying strong focal points and interesting viewpoints rapidly. Look for:

  • Leading lines that draw the eye through the scene
  • Areas of light and shadow that create visual interest
  • Foreground elements that create depth
  • Human activity that tells a story

Many urban sketchers use a viewfinder (either a physical cardboard frame or simply their hands) to help isolate compositions within busy urban environments.

Perspective Made Practical

While understanding perspective is important, urban sketching favors practical approaches over technical precision:

  • Eye-level perspective: The most common approach, with the horizon line at your eye level
  • Measuring by comparison: Use known elements (like stories of a building or human figures) to estimate proportions
  • The "wonky" perspective: Embrace slight inaccuracies—they often add character and energy to sketches
  • Simplification: Reduce complex architectural details to their essential forms

Remember: a sketch with slightly off perspective but strong energy and observation is more compelling than a technically perfect but lifeless drawing.

Capturing People in Motion

One of the biggest challenges for urban sketchers is drawing people who won't stay still. Rather than trying to capture photographic detail, focus on:

  • Gesture drawing: Quick (30-second) sketches that capture the essence of a pose
  • Silhouettes: Simple shapes that suggest human forms without detail
  • Repetition: Drawing the same type of activity (people walking, sitting at cafes) to build understanding of movement
  • Memory: Watching someone for a moment, then looking down to draw what you remember

People add scale, life, and story to urban sketches. Even simple stick figures can effectively suggest human presence when drawn with confidence.

Working with Limited Time

Urban sketching often happens in brief windows of opportunity—during a lunch break, while waiting for a friend, or between rain showers. Develop strategies for different time constraints:

  • 5-minute sketches: Focus on a single element—a doorway, a street sign, a person's silhouette
  • 15-minute sketches: Capture the essence of a scene with simple shapes and limited detail
  • 30-minute sketches: Develop a more complete drawing with some architectural details and background elements
  • 1+ hour sketches: Create detailed drawings with full values, color, and nuanced observation

Practice working at different speeds to become comfortable sketching in any situation.

Developing Your Urban Sketching Style

As you gain experience, you'll naturally develop a personal style. Your style emerges from your choices about what to include, what to emphasize, and how you interpret what you see. Consider these approaches:

Line-First Approach

Many urban sketchers begin with line work, then add color or tone. This approach emphasizes:

  • Confident, expressive line quality
  • Clear depiction of forms and structures
  • The "handwriting" of your drawing style

Line-first sketches can stand alone or serve as underdrawings for watercolor or other media.

Tone-First Approach

Some sketchers begin by establishing values (lights and darks), then refine details. This approach emphasizes:

  • Atmospheric perspective and mood
  • The play of light and shadow
  • Simplification of complex scenes

Tone-first sketching works well with watercolor, ink washes, or toned paper with white highlights.

Color-First Approach

Color-first sketchers begin with color shapes, then add definition with line work. This approach emphasizes:

  • Color relationships and harmonies
  • Atmospheric effects
  • Impressionistic interpretation of scenes

This approach works particularly well for capturing the quality of light at different times of day.

Urban Sketching Locations: From Intimate to Epic

Every urban environment offers endless sketching possibilities. Here are productive locations to explore:

Quiet Corners

Begin with less intimidating subjects that allow for careful observation:

  • Neighborhood cafes and restaurants
  • Quiet courtyards and parks
  • Residential streets with distinctive architecture
  • Museum atriums and lobbies

These locations typically offer places to sit and subjects that move slowly or not at all.

Dynamic Public Spaces

As your confidence grows, tackle more challenging locations:

  • Markets and shopping streets
  • Transportation hubs (train stations, airports, bus terminals)
  • Public squares and plazas
  • Waterfronts and bridges

In these busy environments, focus on capturing the energy rather than perfect details.

Architectural Landmarks

Iconic buildings and structures offer rewarding but challenging subjects:

  • Historic buildings with distinctive details
  • Modern skyscrapers with dramatic perspectives
  • Religious buildings with intricate ornamentation
  • Industrial structures with strong geometric forms

When sketching landmarks, look for unusual viewpoints that offer fresh perspectives on familiar subjects.

The Urban Sketching Community

One of the most rewarding aspects of urban sketching is the global community. Urban Sketchers has local groups in cities worldwide that organize regular sketchwalks—group outings where people sketch together then share their work.

Participating in sketchwalks offers numerous benefits:

  • Learning from other sketchers' approaches and techniques
  • Discovering new locations and viewpoints in familiar cities
  • Building confidence through regular practice
  • Forming friendships with like-minded people

If there isn't a group in your area, consider starting one. The Urban Sketchers website provides resources for establishing local chapters.

Urban Sketching While Traveling

Urban sketching and travel are natural companions. Sketching while traveling transforms how you experience new places:

  • Deeper observation: Sketching requires you to look more carefully than photography
  • Meaningful souvenirs: Your sketchbook becomes a unique record of your journey
  • Connection with locals: Sketching often sparks conversations with residents
  • Mindful travel: The practice encourages you to slow down and be present

When traveling, consider these tips:

  • Pack a minimal, lightweight sketching kit
  • Research sketching locations before your trip
  • Connect with local urban sketching groups
  • Allow extra time for spontaneous sketching opportunities
  • Include written notes alongside drawings to capture context

Overcoming Common Challenges

Every urban sketcher faces obstacles. Here are solutions to common challenges:

Self-Consciousness

Many beginners feel uncomfortable drawing in public. Remember:

  • Most people are curious and positive about seeing someone sketch
  • Start in less conspicuous locations until you build confidence
  • Focus on your drawing rather than worrying about observers
  • Join sketchwalks—drawing in a group normalizes the experience

Weather Conditions

Weather can be both challenge and inspiration:

  • Rain: Work under awnings, in cafes, or use waterproof materials
  • Cold: Wear fingerless gloves and work in shorter sessions
  • Sun: Wear a hat and position yourself in shade when possible
  • Wind: Use clipboards or heavier sketchbooks that stay open

Changing Conditions

Urban environments are constantly changing—light shifts, people move, scenes transform. Rather than fighting this, embrace it:

  • Note the time and conditions in your sketch captions
  • Work quickly to capture the essence before it changes
  • Return to the same location at different times to create series
  • Incorporate changes into your narrative—a sketch that shows both before and after can tell a compelling story

Digital Tools for Urban Sketchers

While urban sketching is fundamentally analog, digital tools can enhance the practice:

  • Photo reference: Take photos after sketching (not before) to document details you might add later
  • Sharing platforms: Instagram, Facebook groups, and the Urban Sketchers blog connect you with the global community
  • Digital sketching: Some sketchers use tablets for certain situations, though most prefer traditional media for on-location work
  • Mapping: Use digital maps to mark sketching locations and plan routes

The key is to use digital tools to support rather than replace the direct observation that makes urban sketching special.

Starting Your Urban Sketching Practice

Ready to begin? Here's a simple approach to get started:

  1. Gather basic supplies: A small sketchbook and a pen are all you need to start
  2. Start small: Begin with 5-10 minute sketches of simple subjects near home
  3. Practice regularly: Even 15 minutes a day builds skills more effectively than occasional long sessions
  4. Be kind to yourself: Embrace "mistakes" as part of your artistic development
  5. Share your work: Join online communities to get feedback and inspiration

Remember that every accomplished urban sketcher was once a beginner. The goal isn't perfection but progress, observation, and enjoyment.

The Transformative Power of Urban Sketching

Beyond creating beautiful drawings, urban sketching offers profound benefits:

  • Mindfulness: The practice requires focused attention, creating a meditative state
  • Memory enhancement: The act of drawing creates stronger memories than photography
  • Connection to place: Sketching fosters deeper relationships with the environments we inhabit
  • Creative confidence: Regular practice builds artistic skills that transfer to other areas of life
  • Community: The global network of urban sketchers creates connections across cultures and languages

In a world that often moves too quickly, urban sketching invites us to slow down, look carefully, and find beauty in the everyday landscapes of our cities. It transforms ordinary moments into creative opportunities and routine locations into sources of inspiration.

Whether you draw the grand cathedral or the corner grocery, the crowded piazza or the quiet alley, urban sketching reminds us that every place has a story worth telling—and every person has the ability to tell it through their own unique perspective.

Back to Blog

Navigating the Art World: How to Prepare for Your First Exhibition

Contemporary art gallery exhibition space with visitors viewing artwork

Your first solo exhibition represents a significant milestone in any artist's career—a moment when your creative vision steps out of the studio and into public view. While exhilarating, this transition can also feel daunting, filled with logistical challenges and strategic decisions that extend far beyond creating the artwork itself. Proper preparation transforms what could be an overwhelming experience into a professionally rewarding showcase of your talent.

This comprehensive guide walks emerging artists through the essential steps of preparing for a successful first exhibition, from initial planning through opening night and beyond.

Defining Your Exhibition Concept

Before selecting specific works or approaching galleries, begin with a clear conceptual framework. A strong exhibition tells a cohesive story rather than simply displaying a collection of individual pieces. Consider what narrative, theme, or exploration connects your work and how you want visitors to experience it.

Your concept might explore a particular technique you've mastered, a social issue that inspires you, an emotional journey you've documented, or a formal investigation of color, texture, or form. Whatever your focus, ensure it's substantial enough to sustain viewer interest throughout the entire exhibition while remaining authentic to your artistic voice.

Key questions to ask: What central idea unifies my work? What emotional or intellectual response do I want to evoke? How does this exhibition represent my current artistic direction?

Selecting and Curating Your Work

Curating your first exhibition requires both artistic sensibility and practical judgment. Rather than including every piece you've created, select works that strengthen your exhibition concept while demonstrating your technical range and artistic development.

Consider the exhibition space itself—how many pieces can it comfortably accommodate without feeling crowded? What dimensions work best with the wall configurations and lighting? Create a balanced selection that includes both statement pieces that command attention and smaller works that invite intimate viewing.

When sequencing your exhibition, think about the viewer's journey through the space. Create visual rhythm by alternating between large and small pieces, bold and subtle works, or different color palettes. Consider how each piece converses with its neighbors and how the arrangement supports your overall narrative.

Curatorial tips: Include 1-2 stronger recent pieces rather than older, less representative work; create visual resting spaces within the installation; test your arrangement by creating a miniature mock-up of the gallery space.

Preparing Your Artwork for Display

Professional presentation significantly impacts how your work is perceived. Even the most compelling artwork can be undermined by poor framing, improper lighting, or inadequate labeling.

For works on paper, invest in quality framing that complements rather than competes with your art. Conservation-grade materials protect your work while demonstrating professional standards. For canvases, ensure edges are properly finished—either with continued painting or a clean, neutral tone. Three-dimensional works require stable, appropriate bases or mounting systems.

Lighting deserves particular attention. Work with the gallery to ensure each piece is properly illuminated, with consideration for both visual impact and conservation concerns (especially for works sensitive to UV light). Test lighting arrangements during installation to identify and correct shadows, glare, or uneven illumination.

Presentation checklist: Professional framing or edge finishing; secure hanging systems; consistent, informative labeling; appropriate protective glazing where needed; consideration of sightlines and viewing distances.

Pricing Your Work Strategically

Determining appropriate prices for your artwork requires balancing multiple factors: your career stage, material costs, time investment, comparable market rates, and the specific context of the exhibition.

Research what artists at similar career stages charge for comparable work in your region. Consider creating a pricing structure that reflects size, medium, and complexity. While you shouldn't undervalue your work, be realistic about what represents fair market value for an emerging artist.

Remember that pricing consistency builds collector confidence. Avoid significant price jumps between similar works unless clearly justified by materials, scale, or artistic development. Include the cost of framing in your prices, as collectors expect exhibition-ready work.

Pricing considerations: Your exhibition history and credentials; medium and size; material and framing costs; local market conditions; gallery commission structure; potential for creating multiple price points to accommodate different collector budgets.

Creating Supporting Materials

Professional supporting materials contextualize your work and facilitate engagement with viewers, critics, and potential buyers. These elements extend the life of your exhibition beyond its physical run.

An artist statement specifically written for the exhibition provides essential context for your work. Keep it concise (150-300 words) and focused on the ideas behind the exhibition rather than your general artistic philosophy. Provide individual information for significant pieces without over-explaining—allow viewers space for their own interpretations.

A professional biography highlights your relevant education, exhibitions, awards, and collections. Tailor it to the specific audience of the exhibition. High-quality photographic documentation is essential for promotion and archives—consider hiring a professional if possible.

Essential materials: Exhibition-specific artist statement; professional biography; artwork labels with title, medium, dimensions, and year; price list; high-resolution images of your work; installation shots after the exhibition opens.

Planning Your Exhibition Promotion

Even the most compelling exhibition requires strategic promotion to attract your target audience. Begin planning your marketing campaign 6-8 weeks before the opening to build anticipation.

Create a cohesive visual identity for your exhibition that extends across all promotional materials—invitations, social media graphics, website content, and press releases. This consistency strengthens brand recognition and presents a professional image.

Develop a targeted invitation list that includes collectors, gallery owners, critics, fellow artists, and art enthusiasts. Send physical invitations to key contacts and digital versions to broader networks. Follow up with reminders as the opening approaches.

Leverage social media to document your preparation process without revealing everything. Tease specific works, share studio glimpses, and count down to the opening. Consider creating a dedicated hashtag for your exhibition.

Promotional timeline: 6-8 weeks: begin social media teasers; 4 weeks: send press releases to art publications; 3 weeks: distribute digital invitations; 2 weeks: send physical invitations; 1 week: final social media push; opening day: live social media coverage.

Preparing for the Opening Reception

The opening reception represents your best opportunity to connect with viewers, receive immediate feedback, and potentially make sales. Thorough preparation allows you to be present and engaged rather than overwhelmed by logistics.

Prepare talking points about your work that you can adapt to different types of conversations. Practice discussing your process, inspiration, and techniques in accessible language that welcomes rather than alienates viewers. Remember that not everyone visiting will have an art background.

Coordinate with the gallery regarding practical arrangements: refreshments, staffing, music, and any special events like artist talks or demonstrations. Ensure someone is designated to handle sales inquiries so you can focus on engaging with visitors.

Dress professionally while maintaining personal style. You'll likely be photographed extensively, so choose an outfit that reflects your artistic identity while respecting the formal nature of the occasion.

Opening night preparation: Practice discussing your work; prepare answers to common questions; arrange for assistance with sales inquiries; confirm event logistics with the gallery; plan your arrival well before the official start time.

Managing Post-Exhibition Opportunities

Your responsibilities continue after the opening reception. Maximize the exhibition's impact by actively managing its entire run and planning for what comes next.

Visit the exhibition periodically during its run to observe how viewers interact with your work. Take installation photographs under different lighting conditions and at various times of day. These images become invaluable for future applications, promotions, and your portfolio.

Maintain engagement with visitors who expressed interest but didn't purchase. The gallery should provide you with contact information for serious inquiries (with permission). Follow up appropriately without being pushy—sometimes collectors need time to consider a purchase.

After the exhibition closes, conduct a thorough assessment. What worked well? What would you do differently? How did viewers respond to specific pieces? What networking opportunities emerged? This reflection informs your approach to future exhibitions.

Post-exhibition actions: Document the installed exhibition; follow up with interested contacts; update your portfolio and website; send thank you notes to key supporters; evaluate the experience for future planning.

Building on Your Exhibition Success

Your first exhibition represents not an endpoint but a foundation for your continuing artistic career. The connections made, feedback received, and lessons learned all contribute to your development as a professional artist.

Leverage your exhibition experience in applications for future opportunities. Mention it in your biography, include installation shots in your portfolio, and reference specific accomplishments in grant applications. Each exhibition builds your credibility and visibility within the art world.

Stay connected with contacts made during the exhibition through occasional updates about your work. Social media makes maintaining these connections easier than ever—share studio updates, new works in progress, and announcements of future exhibitions.

Most importantly, continue creating. Your first exhibition represents a milestone in an ongoing artistic journey. Let the experience inform but not limit your future direction. The confidence gained from successfully presenting your work to the public often opens new creative possibilities.

At Orchard Ribbon Field, we support emerging artists through mentorship, resources, and exhibition opportunities. Our network of galleries, collectors, and arts professionals helps bridge the gap between studio practice and public presentation. Whether you're preparing for your first exhibition or your tenth, we provide the strategic guidance and practical support needed to present your work with confidence and professionalism.

Remember that every established artist once faced their first exhibition with a mixture of excitement and apprehension. With thorough preparation, strategic thinking, and authentic engagement with your audience, your debut can launch the next phase of your artistic career.

Back to Blog